A Quick Look at VirtualDVD Features
Features of product
* Completely 100% FREE Software
* All supported CD/DVD/Blu-ray image formats
CloneCD (*.ccd), CDRWin (*.bin), Cue Sheets (*.cue), CDImage (*.img), ISO (*.iso),
BlindRead (*.bwt), BlindWrite (*.b5t; *.b6t), Alcohol 120% Image (*.mds;*.mdf),
Disc Juggler (*.cdi), Instant CD/DVD (*.pdi), Compressed ISO (*.isz), Nero (*.nrg),
CloneDVD (*.dvd), CDSpace6 (*.LCD), Media Data eXtended (*.MDX), Media Descriptor Sidecar(*.MDS)
* Emulate up to 24 SCSI devices in all
* Perform image mounting to local NTFS folders
* Customize virtual drives: change a drive letter, DVD region
* Support Encrypted isz(Compressed ISO) file
How to Start
VirtualDVD is very easy and simple.
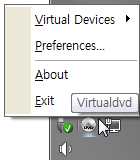
1. Click(Left or Right) the VirtualDVD's trayicon.
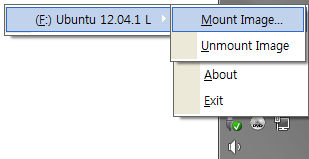
2. Select Menu(Virtual Devices->Mount Image).
3. Select CD/DVD Image file.
- Trayicon Menu
- Mount Image Menu
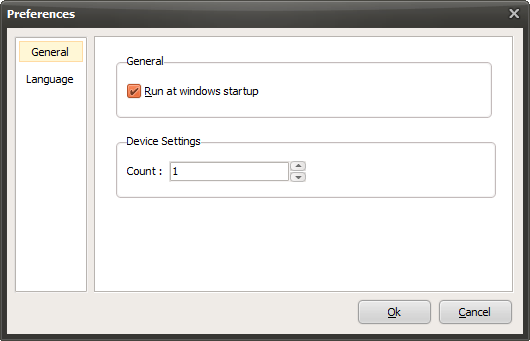
- Preferences
Today's News/Tips
How to Capture Images with oCam
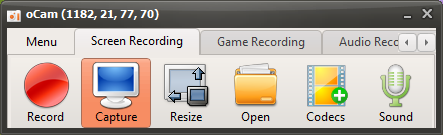
Clicking the Capture button on the main screen of oCam immediately captures the screen within the recording area you have set. This feature is very useful when you want to save a precise snapshot of a specific part of the screen. Through oCam's intuitive interface, users can freely adjust the capture area in advance and take screenshots exactly as needed by selecting the full screen, a specific window, or a custom area. This flexibility is especially useful for document work, preparing presentation materials, or for IT professionals who need to record specific UI elements.
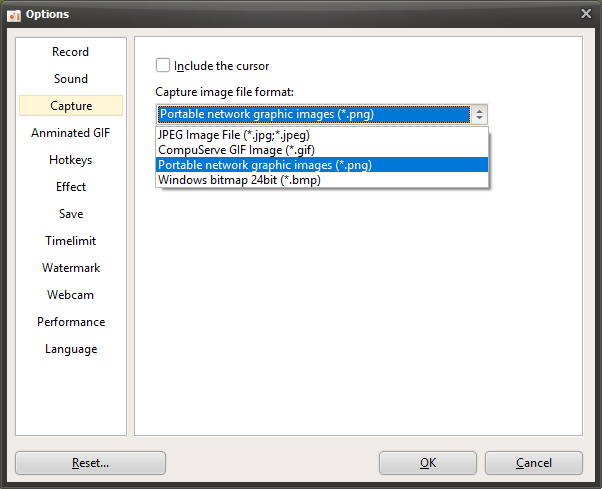
Once the capture is complete, oCam saves the image in PNG format by default, providing a sharp, high-quality result. PNG format supports lossless compression, so you can keep clear screenshots without any loss of image quality, and it is compatible with most image editing software and platforms. In the oCam settings menu, users can also change the save format to other types such as JPG or BMP, allowing them to balance file size and quality according to project requirements.
To check the captured image, click the "Open" button on the main screen of oCam. When you click this button, Windows Explorer opens automatically and shows the most recently captured file already selected. This feature helps users review and use captured images right away. Since it takes you directly to the folder where the file is saved through Windows Explorer, file management also becomes much easier.
oCam's capture feature is simple yet powerful, making it useful in a wide range of situations from everyday tasks to professional environments. For example, software developers can use it to record bugs or share UI designs, while instructors can use it to prepare teaching materials. In addition, through the oCam settings menu, you can change the save location to a custom folder or set file naming rules when capturing for more organized file management. In this way, oCam provides high-quality screenshots with simple controls and greatly improves work efficiency.