oCam Advanced Settings - Capture
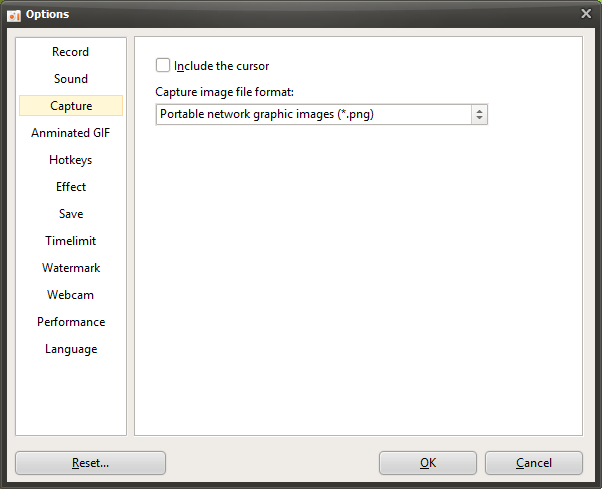
oCam is a multifunctional program that not only supports screen recording but also provides a screen capture feature, allowing users to save specific moments on the screen as images easily. In the settings window that appears when you click the "Tools - Options" menu, the "Capture" category on the left provides options for adjusting settings related to screen capture. This tab is designed so users can customize the details of the capture feature, and it can be used intuitively by everyone from beginners to IT professionals. Below is a detailed explanation of the main settings in the "Capture" category.
Overview of the Capture Feature
The settings in the "Capture" category are the options that apply when you click the "Capture" button in the main oCam window or press the default hotkey (F3). Through these settings, users can choose the format of the captured image and decide whether to include additional elements such as the mouse cursor. The capture feature is very useful when creating tutorials, preparing software documentation, or saving a specific moment on the screen.
Include Mouse Cursor
The "Include Mouse Cursor" option determines whether the mouse cursor will be included in the captured image. By default, this option is unchecked, so the mouse cursor is not included in captured images. This is suitable when you want a clean image. However, if you want to highlight the cursor position for lecture materials or software usage guides, you can check this option to include the cursor in the image. For example, when capturing the process of clicking a specific button, including the cursor can make the material visually clearer.
Image File Format for Capture
The "Image File Format for Capture" setting lets you choose the file format used to save captured images. oCam supports several image formats, and by default it is set to PNG. PNG is the most recommended format because it provides lossless compression, allowing you to save clear images without any loss in quality. Other supported formats may include JPEG and BMP. JPEG is useful when you want to reduce file size, but it may cause some loss of image quality. Users can choose the most appropriate format by considering storage space, image quality requirements, or compatibility with a particular platform.
Usage Tips
The settings in the "Capture" category are simple, but they play an important role in improving how captured images can be used. For example, when creating tutorials, enabling the "Include Mouse Cursor" option can clearly show where the user is clicking or interacting. Using PNG format by default helps maintain high image quality, making it suitable for professional documentation. On the other hand, if minimizing file size is important, you can choose JPEG format to save storage space. If you often use the capture hotkey (F3), changing it to a different key or becoming familiar with it can also help improve your workflow.
In addition, if you want to review and edit captured images immediately after saving them, it is a good idea to set the save location in advance in oCam. This makes it easier to find and use captured images quickly. If you are capturing the UI of specific software or a game screen, be sure to define the capture area accurately so that unnecessary parts are not included.
Today's News/Tips
oCam Advanced Settings - Save
Click Tools - Options on the oCam main menu to view the settings in the Save category.
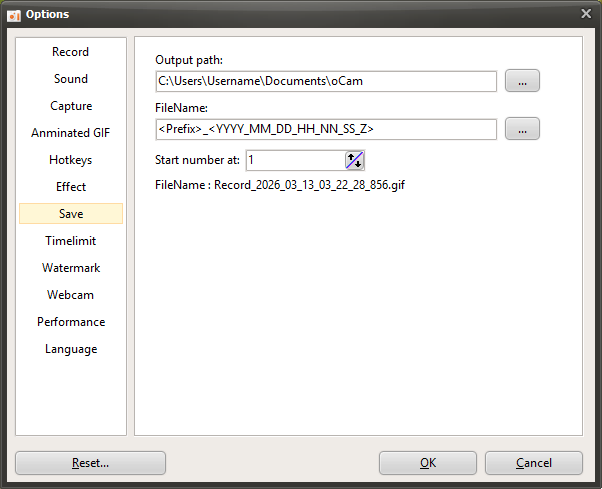
By default, the save path is set to the "This PC-Documents-oCam" folder in Windows 10, and all recordings, audio recordings, and captures are saved to this location.
The save path can be changed by clicking the button.

The file name to be saved follows a predefined format or a user-defined format, and by default it is set to "<Prefix>_<YYYY_MM_DD_HH_NN_SS_Z>".
The file name format can also be changed by clicking the button, and when you click it, you can see the predefined formats.
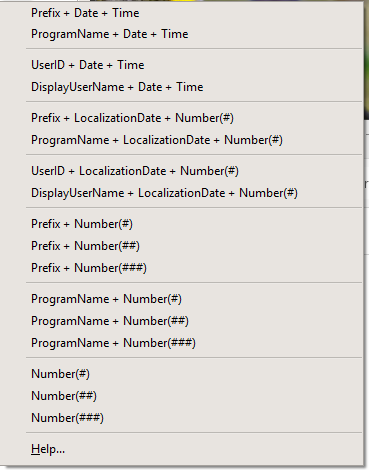
If you click the Help menu item, you can see more detailed information about the format, as shown below.
( When the Help menu item was clicked at 11:29:49.902 AM on June 16, 2016 )
<Y> = 16
<YY> = 16
<YYYY> = 2016
<M> = 6
<MM> = 06
<MMM> = 6
<MMMM> = June
<D> = 16
<DD> = 16
<DDD> = Thu
<DDDD> = Thursday
<DDDDD> = 2016-06-16
<DDDDDD> = Thursday, June 16, 2016
<C> = 2016-06-16 11:29:49 AM
<H> = 11
<HH> = 11
<N = 29
<NN> = 29
<S> = 49
<SS> = 49
<Z> = 902
<ZZZ> = 902
<T> = 11:29 AM
<TT> = 11:29:49 AM
<AM/PM> = AM
<a/p> = a
<ampm> = AM
<Prefix> = Recording
<ProgramName> = oCam
<UserID> = User Name
<DisplayUserName> =
<#> = 1
<##> = 01
<###> = 001
The file name format may feel difficult for some users, so here are a few examples.
- If the file name is <Prefix>_<#>, then <Prefix> is the prefix and # is the serial number.
The prefix is replaced with Recording when recording video, Audio when recording sound, and Capture when capturing the screen, while # is replaced with a serial number.
For example, when you finish recording the screen, a file named Recording_1 is created. ( Only if there is no similar file name in the oCam save folder. )
And when you record again, a file named Recording_2 is created. The reason the serial number becomes 2 is because a file named Recording_1 already exists.
- If the file name is <ProgramName>_<#>, then <ProgramName> represents the name of the program being recorded. In normal screen recording, it is replaced with oCam, and <#> is added as a serial number just as before.
However, when recording a game, recording starts inside the game program, so the file is created using the name of the game's executable file.
- If the file name is <dddddd>_<#>, then dddddd means the localized date, so on a Korean operating system it is replaced with the current date at the time this was written, Thursday, June 16, 2016, and # is filled in with a serial number.
The localized date varies depending on the language settings of the operating system. In other words, it appears differently on an English OS because it uses the format built into the operating system.
- If the file name is My_<#>_th_<Prefix>_File, then when recording, a file named My_1st_Recording_File is created, and when recording again, the file name becomes My_2nd_Recording_File.
- If the file name is <UserID> recorded <Prefix> of the game called <ProgramName> on <DDDDDD>. then it may be created as "AdvancedDeveloper recorded Recording of the game called LocalDeformablePRT on Thursday, June 16, 2016." The content inside <> varies depending on what is being recorded.
Serial number start means the starting number of the serial number that can be set with # inside <>.