Moving the recording area while recording is in progress.
During recording, you can move the recording area.
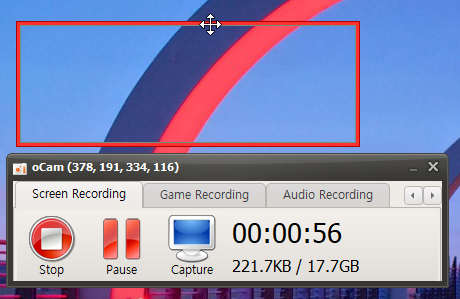
Here is how to move the recording area while recording.
oCam provides the ability to adjust the recording area flexibly even while recording.
When recording is in progress, click the border of the recording area with the mouse.
While holding it, drag the mouse to move the recording area freely to the desired position.
This feature is very useful when you need to follow and record a specific part of the screen in real time.
For example, you can track a moving window or specific content while recording.
However, if you drag too quickly, recording may stutter, so move it smoothly.
Use this method to adjust the area smoothly while recording and continue your work smoothly.
Today's News/Tips
How to Fix Audio Coming from Only One Speaker During Microphone Recording
When recording microphone audio with oCam through a professional audio interface, the sound may not be recorded properly because of issues that differ from those of a standard microphone. In particular, when using an audio interface, problems can occur because the microphone input is handled as mono (a single channel). Below is a detailed explanation of how to resolve this issue and important points to keep in mind.
When recording microphone audio through an audio interface, you may encounter a problem where the sound comes from only one speaker channel, such as the left or right side. This happens because of the way the audio interface handles mono input. To fix this, you need to adjust the microphone input source setting in oCam. Please follow the steps below:
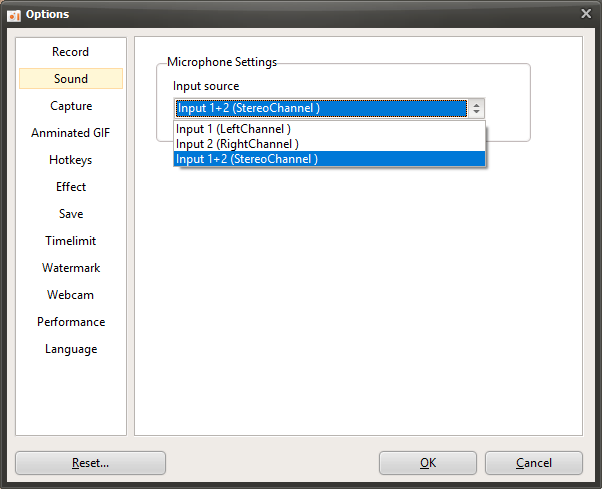
1. In the oCam main window, click 'Tools' in the top menu, then select 'Options'.
2. When the Settings window opens, click the 'Sound' tab in the left menu.
3. In the 'Sound' tab, find the 'Microphone Settings' section and check the 'Input Source' setting.
4. If the microphone audio is heard only from the left speaker, change the input source to 'Input 1 (Left Channel)'.
5. Conversely, if the microphone audio is heard only from the right speaker, change the input source to 'Input 2 (Right Channel)'.
6. After saving the settings, try recording again and check whether the sound is recorded properly.
Notes
- In general, microphone input is mono, but in the case of inexpensive standard microphones, even if the physical input is mono, the software may process it as stereo, with identical data on the left and right channels. However, microphones used with professional audio interfaces are handled as mono both in the actual input and in software processing, so you must explicitly set the input source as described above for proper recording.
- If the microphone audio is heard only from the left speaker and you set it to 'Input 1 (Left Channel)' but no sound is recorded, while it records normally when set to 'Input 2 (Right Channel)', the left and right speaker channels may be physically reversed. In that case, you should check whether the physical speaker positions have been swapped or whether the left and right inputs of the cables connected to the audio interface have been reversed. For example, the speaker cables may be connected incorrectly, or the output settings of the audio interface may be reversed.
With these settings, you can record microphone audio properly in oCam even when using an audio interface. If the problem continues after changing the settings, it is recommended to also check the audio interface driver settings and connection status.