The "Failed to initialize sound library." Error Appears When Recording Starts
When recording with oCam, sound-related errors may occur. To prevent this, it is important to first check whether sound playback is working properly on your PC. If you try to record on a PC where sound playback is not available, an error is likely to occur. Below is a detailed explanation of how to record with oCam in an environment where sound playback is unavailable and how to configure the settings to avoid errors.
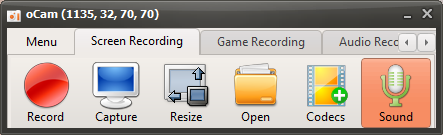
If sound is not playing properly on your PC, you can solve the problem by disabling oCam's system audio recording feature. Please follow the steps below:
1. Launch the oCam main window.
2. In the main window, click the 'Sound' button.
3. When you click it, a pop-up menu will appear, and in most cases the 'Record System Audio' option will be checked by default.
4. Click the 'Record System Audio' item to uncheck it.
With this setting, oCam will not try to record system audio, so you can continue recording without errors even on a PC where sound playback is not available. This setting is especially useful in environments where system audio is not output due to sound driver problems or hardware issues.
Before recording, always check the sound playback status of your PC and apply the setting above if necessary to create a stable recording environment. If you want to resolve the sound playback issue more fundamentally, updating the sound driver or checking the device's sound settings is also a good approach.
Today's News/Tips
How to Resize the Recording Area in oCam
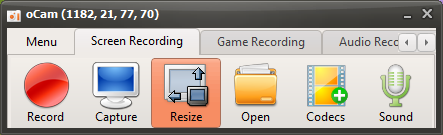
The main screen of oCam includes various buttons designed for intuitive use of its features, and among them, the "Resize" button is one of the key functions for customizing the recording area. When you click this button, a clean and user-friendly pop-up menu appears. This menu provides a variety of options for flexibly adjusting the size and resolution of the recording area, making it easy for everyone from beginners to IT professionals to configure settings that best fit their working environment.
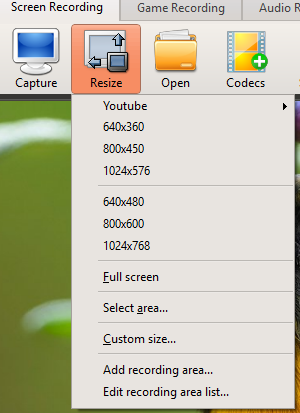
When the pop-up menu opens, the sizes shown represent the resolution of the recording area, and clicking a menu item immediately adjusts the recording area to the selected resolution. For example, if you choose a standard resolution such as 1920x1080 (Full HD) or 1280x720 (HD) under the YouTube category, the oCam recording frame will be set to that size and recording will proceed at the exact resolution. oCam supports resolutions up to 4K (3840x2160) by default, making high-resolution content creation possible. In particular, when using the MPEG-4 codec, it supports resolutions up to 8K (7680x4320). This is especially useful for professionals who need high-quality video production, such as recording high-resolution gameplay footage or performing professional video editing work.
The pop-up menu also includes a "Full Screen" menu item. Clicking this option automatically sets the recording area to cover the entire monitor screen. If you press the Record button in this state, the whole screen will be recorded, which is especially useful when capturing the entire desktop, presentations, or full-screen gameplay. Full Screen mode is the best choice when you want to record all on-screen content easily without setting a separate area.
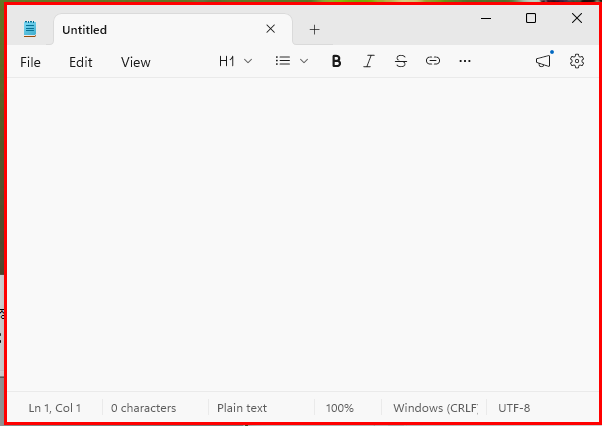
Another powerful feature is the "Find Recording Target Window" menu item. When you click this option, the window under the mouse pointer is highlighted with a red rectangular box. If you move the mouse over the window you want and click it, that window area is automatically set as the recording area. This feature is very useful when you want to record or capture only a specific window, such as an application or browser window. For example, when creating software tutorials or recording the workflow of a specific program, you can capture only the necessary window cleanly without unnecessary background, greatly improving work efficiency.
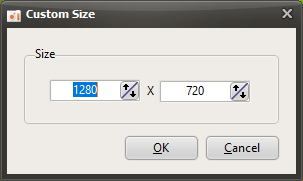
Finally, the "Custom Size" menu item is an option that allows users to control the size of the recording area more precisely. Clicking this menu opens a separate input window, where users can directly enter the horizontal and vertical pixel values of the desired resolution to set the recording area. This feature is especially useful when a non-standard resolution or a custom size is needed for a specific project. For example, it can be used when you need to match the resolution requirements of a video for upload to a social media platform or record at a size optimized for a specific device.
With these various options, oCam's resize feature makes it possible to set the recording area flexibly and precisely according to the user's needs. The ability to set the desired resolution and area with just a few clicks clearly shows oCam's intuitive design and efficiency. In addition, you can further optimize your workflow by adjusting the save path, file naming rules, or detailed codec settings in the Settings menu. If you want high-quality video or need to capture a specific window, we recommend actively using oCam's resize feature to get the results you want with ease.