Recommended

What to Do If the "Failed to av_image_alloc" Error Appears When Starting Recording
Using oCam at work or school? A license is required, and it removes all ads, including this window. See the paid version →
While using oCam, this error message may appear in very rare cases. This error is usually caused by insufficient available memory on the Windows system. Below is a detailed explanation of how to resolve this issue.
The first solution is to reduce memory usage. To do this, close other programs that are currently running to free up system memory, then try recording again with oCam. The more programs you have running, the more system resources are divided, so closing unnecessary programs can help reduce memory shortage issues.
The second method is to reduce the size of the recording area. If the recording area is set too large, memory usage can increase. In oCam, try reducing the recording area using the mouse or shortcut keys (such as Shift + arrow keys) before recording. This can lower memory usage and help prevent the error.
Third, this issue can also occur if oCam's video resolution setting is too high. For example, if recording is set to a high resolution such as 8K, it can place a heavy load on system memory. To fix this, follow the steps below:
1. In the oCam main window, click 'Tools' in the top menu, then select 'Options'.
2. In the Settings window, go to the 'Recording' tab.
3. In the 'Resize' section, find the 'Video Resize' option and check the currently configured resolution.
4. Change the resolution to a lower value, such as 1080p or 720p, and save the setting.
5. Restart oCam and try recording again.
Applying the methods above can resolve errors caused by insufficient memory and allow you to record more reliably in oCam. If the problem continues, consider checking your system's memory status or updating oCam to the latest version.
Programs
Another helpful tip
oCam Advanced Settings - Mouse Cursor Effects - Highlight Effects
Click Tools - Options on the oCam main menu, then open the Effects category to check the Highlight Effect settings.
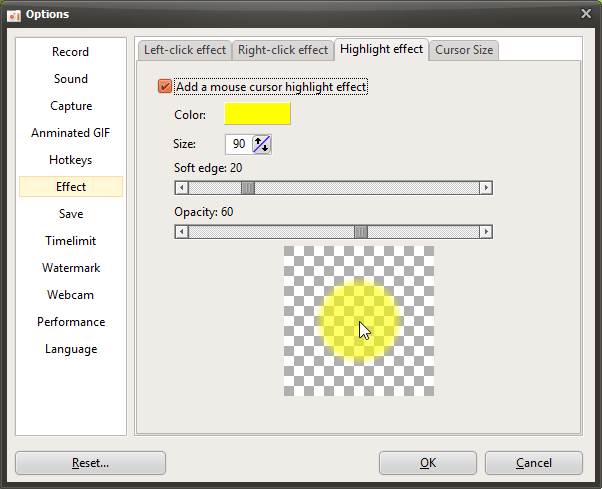
The Highlight Effect is used to help viewers immediately recognize the current position of the mouse cursor while watching a video.
The options are described below.
Color
- This is the color applied to the highlight effect. It is set to yellow by default.
Size
- When the highlight effect is enabled, a semi-transparent circle is drawn around the mouse cursor. This option sets the size of that circle. It is set to 90 by default.
Soft Edge
- The higher this value becomes, the softer the edge of the circle appears.
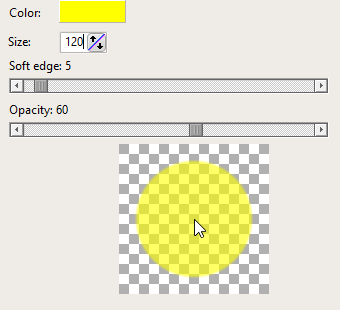
Opacity
- The lower this value is, the more transparent the circle becomes.
Preview
- Lets you preview the mouse effect you have configured.
If the opacity value is set too high, the highlight effect may cover the part of the screen where the mouse is located. For that reason, it is best to use an appropriate opacity setting.