Recommended




How to Capture Images with oCam
Using oCam at work or school? A license is required, and it removes all ads, including this window. See the paid version →
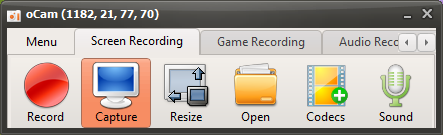
Clicking the Capture button on the main screen of oCam immediately captures the screen within the recording area you have set. This feature is very useful when you want to save a precise snapshot of a specific part of the screen. Through oCam's intuitive interface, users can freely adjust the capture area in advance and take screenshots exactly as needed by selecting the full screen, a specific window, or a custom area. This flexibility is especially useful for document work, preparing presentation materials, or for IT professionals who need to record specific UI elements.
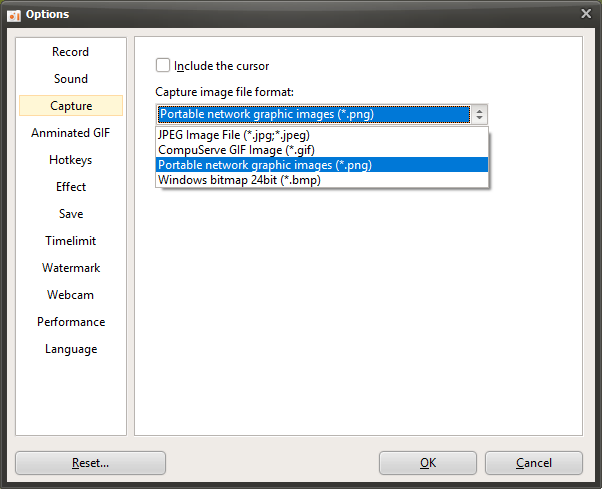
Once the capture is complete, oCam saves the image in PNG format by default, providing a sharp, high-quality result. PNG format supports lossless compression, so you can keep clear screenshots without any loss of image quality, and it is compatible with most image editing software and platforms. In the oCam settings menu, users can also change the save format to other types such as JPG or BMP, allowing them to balance file size and quality according to project requirements.
To check the captured image, click the "Open" button on the main screen of oCam. When you click this button, Windows Explorer opens automatically and shows the most recently captured file already selected. This feature helps users review and use captured images right away. Since it takes you directly to the folder where the file is saved through Windows Explorer, file management also becomes much easier.
oCam's capture feature is simple yet powerful, making it useful in a wide range of situations from everyday tasks to professional environments. For example, software developers can use it to record bugs or share UI designs, while instructors can use it to prepare teaching materials. In addition, through the oCam settings menu, you can change the save location to a custom folder or set file naming rules when capturing for more organized file management. In this way, oCam provides high-quality screenshots with simple controls and greatly improves work efficiency.
Programs
Another helpful tip
oCam Advanced Settings - Recording - Resize
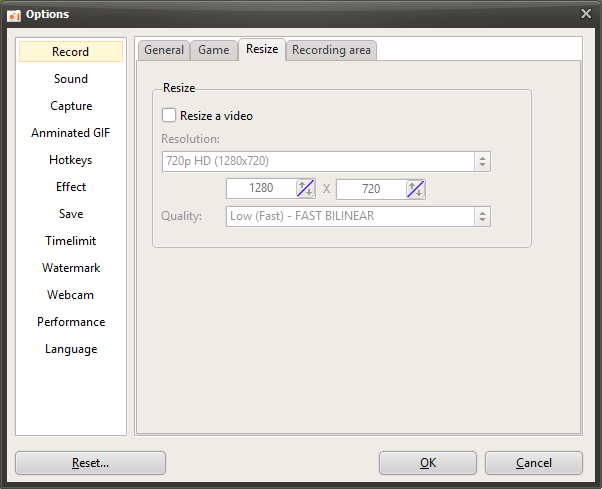
oCam is a powerful screen recording program that lets users freely adjust video quality and resolution through a variety of recording settings. In the settings window that appears when you click "Tools - Options," the "Resize" tab under the "Recording" category provides features for fine-tuning the output resolution and quality of recorded videos. This tab is especially useful for users who want to optimize the output size and quality of their videos, and it can be used effectively by everyone from beginners to IT professionals according to their needs. Below is a detailed explanation of the main settings in the "Resize" tab.
Resize Video
If you check the "Resize Video" option, the size of the recorded video will be adjusted according to the resolution and quality settings you choose. This feature is useful when you want to resize the recorded video to a specific resolution in order to reduce file size or output it in a format optimized for a certain platform such as YouTube or Twitch. If this option is not enabled, the video will be saved at the original size of the recording area, and the resizing process will be skipped.
Supported Resolutions (Presets)
oCam provides a variety of resolution presets so users can easily choose the output size they want. The supported resolution presets are as follows:
4320p UHD 8K (7680x4320): Ultra-high-resolution video available on high-spec systems. However, only the MPEG-4 codec supports this resolution, and other built-in codecs do not support 8K.
2160p UHD 4K (3840x2160): Suitable for producing high-quality video.
1440p QHD (2560x1440): Provides sharp image quality and is suitable for users with high-resolution monitors.
1080p FHD (1920x1080): The most widely used standard resolution for YouTube and streaming platforms.
720p HD (1280x720): Suitable for general web content.
480p (854x480), 360p (640x360), 240p (426x240), 144p (256x144), 120p (160x120), 96p (128x96): Low-resolution options that can reduce file size or be used in lower-spec environments.
Half Size: Outputs the recording area with both width and height reduced by half.
Specify Width Only and Keep Height Fixed: If the user enters a width, the height is adjusted based on the original recording area height.
Specify Height Only and Keep Width Fixed: If the user enters a height, the width is adjusted based on the original recording area width.
Custom: Lets the user directly enter the desired width and height to output at a fully customized size.
If you use an external codec, some resolutions may not be supported depending on the codec's characteristics, so it is a good idea to check codec compatibility before recording.
Resolution Adjustment Methods
Half Size: This option reduces the width and height of the recording area to 50% each. For example, if the original recording area is 1920x1080, setting it to Half Size will output it at 960x540. This is useful when you want to reduce file size.
Specify Width Only and Keep Height Fixed: When the user enters a width, the height is calculated automatically while maintaining the original aspect ratio of the recording area. For example, if the width is set to 1280 and the original height is 720, the output resolution becomes 1280x720.
Specify Height Only and Keep Width Fixed: Conversely, when a height is entered, the width is adjusted to match the original aspect ratio. This method is suitable for platforms that require a specific vertical resolution, such as mobile content.
Custom: Both the width and height can be entered directly, allowing the output size to be adjusted exactly as desired. This option is suitable for advanced users with specific resolution requirements.
Quality Setting
The "Quality" setting determines the image quality of the output video when resizing is applied. The higher the quality, the sharper the video will be, but resizing may take longer and consume more system resources. On the other hand, lowering the quality speeds up the resizing process, but the sharpness of the video may decrease somewhat. Users should choose an appropriate quality level by considering file size, system performance, and the purpose of the video, such as high-quality streaming or simple sharing.
Usage Tips
The settings in the "Resize" tab can be adjusted flexibly depending on the purpose of the video and the system environment. For example, if you want to record in 1080p FHD for YouTube upload, it is best to choose that preset and set the quality to high. On the other hand, if you want a smaller video file for quick upload to social media, choosing a lower resolution such as 720p or 480p and setting the quality moderately lower can be more efficient. If you want to try 8K recording, you must use the MPEG-4 codec, and it is important to check in advance whether your system supports it. Also, by using custom resolutions, you can create videos that match the exact requirements of a particular platform or project.
The "Resize" tab in oCam supports a wide range of recording scenarios through intuitive presets and flexible custom options. Beginners can get started easily with simple presets, while IT professionals can achieve optimal results through detailed resolution and quality adjustments. Try using these settings according to your recording purpose and system environment.