Recommended


How to Use the x264vfw External Codec
Using oCam at work or school? A license is required, and it removes all ads, including this window. See the paid version →
oCam supports external codecs (VFW), and here we will look at how to use the x264 codec.
You can download the x264 codec from the site below.
https://sourceforge.net/projects/x264vfw/
Go to the site and click the Download button.
The download will start automatically.
On the installation screens, just keep clicking Next.
Accept the license agreement.
Specify the installation path.
The installation is complete.
Click Finish.
After installing the codec, you must restart oCam before it will appear in the external codec list.
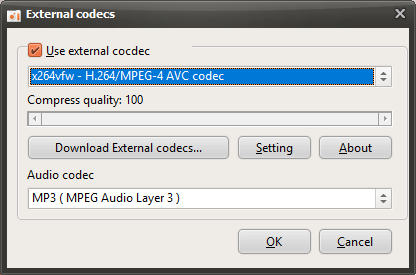
After restarting oCam, click the Codec button in the oCam main window, then click the External Codec menu.
Select the Use External Codec checkbox.
From the list, select x264vfw - H264/MPEG-4 AVC codec.
Then click the Settings button to view the detailed codec settings.
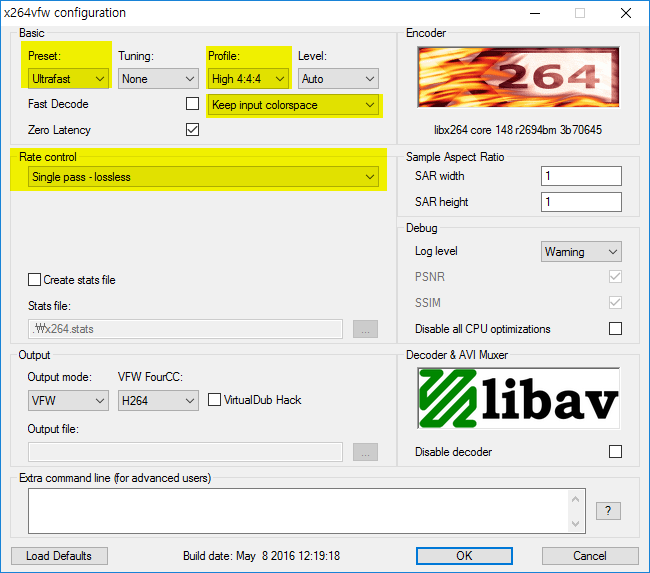
The codec settings window will appear as shown below. Since we need to record the screen in real time rather than perform normal video encoding, select Ultrafast in Preset and check the Zero Latency checkbox so that encoding is performed as quickly as possible, then click the OK button.
( This setting method is useful for real-time recording, and you can adjust it as needed depending on your situation. )
After configuring it this way, your recording will use the x264 codec.
* For game recording, if the game you want to record is 64-bit, you must also install the 64-bit version when installing x264vfw ( by default, it is installed automatically unless you change the installation options ). Then run x264vfw - Configure x264vfw64 from the Start menu and configure it the same way as described above.
* The x264vfw settings Keep/Accept only YUV 4:2:0, Keep/Accept only YUV 4:2:2, and Keep/Accept only YUV 4:4:4 are not supported, and recording will fail if you use those settings.
Programs
Another helpful tip
oCam Advanced Settings - Mouse Cursor Effects - Highlight Effects
Click Tools - Options on the oCam main menu, then open the Effects category to check the Highlight Effect settings.
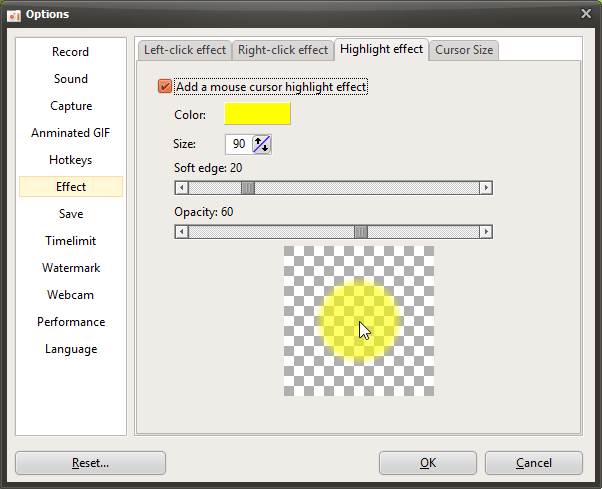
The Highlight Effect is used to help viewers immediately recognize the current position of the mouse cursor while watching a video.
The options are described below.
Color
- This is the color applied to the highlight effect. It is set to yellow by default.
Size
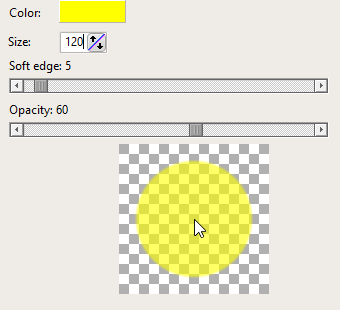
- When the highlight effect is enabled, a semi-transparent circle is drawn around the mouse cursor. This option sets the size of that circle. It is set to 90 by default.
Soft Edge
- The higher this value becomes, the softer the edge of the circle appears.
Opacity
- The lower this value is, the more transparent the circle becomes.
Preview
- Lets you preview the mouse effect you have configured.
If the opacity value is set too high, the highlight effect may cover the part of the screen where the mouse is located. For that reason, it is best to use an appropriate opacity setting.