Recommended




How to Record Your Screen with oCam
Using oCam at work or school? A license is required, and it removes all ads, including this window. See the paid version →
First, use the mouse to adjust the green recording frame and set the recording area.
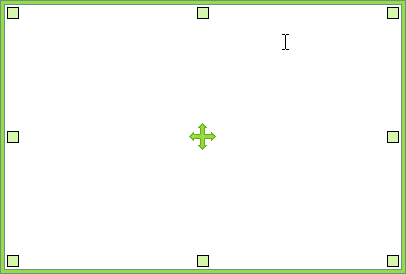
The center drag handle lets you move the recording area with the mouse,

The small squares at each corner can be dragged with the mouse to resize the recording area.

The large rectangular box is the area that will be recorded on the screen.
Once the recording area is set, click the Record button on the oCam main window or press the default hotkey ( F2 ) to start recording. ( The hotkey can be changed in Options. )
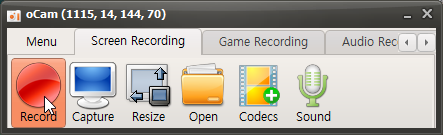
When recording starts, the oCam main window changes as shown below.
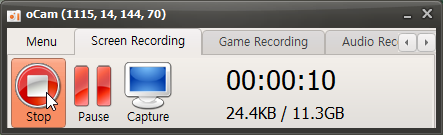
The Stop button stops recording, Pause pauses the recording, and Capture lets you take a capture even while recording is in progress.
It also shows the remaining time, the size of the file currently being recorded, and the remaining space on the hard disk.
The recording frame also turns red, and when the frame is red, it means recording is in progress.

When you click Stop Recording, the recording ends. To check the recorded video, click the Open button.
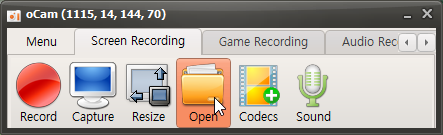
Clicking the Open button opens Windows Explorer and selects the recorded file.
The recorded video can be played in a video player,
and it can also be uploaded to sites like YouTube.
Programs
Another helpful tip
How to Move the Recording Area While Recording
The ability to move the recording area while recording with oCam is very useful when you want to flexibly capture a specific part of the screen in real time. Below is a detailed explanation of how to move the recording area during recording.
To change the recording area while recording is in progress, you can use the border of the recording area. Specifically, even after recording has started in oCam, you can click and drag the border of the recording area window with the mouse to move the recording area to the desired position in real time. This feature can be used simply with mouse control and is intuitive to use without any separate shortcut keys or complicated settings.
For example, when recording gameplay, if a specific part of the screen moves or changes, such as a character's position or a certain UI element, you can drag the border to adjust the recording area in real time and capture the scene you want without missing it. This method is especially useful when recording dynamic content, helping the user respond quickly and continue tracking the necessary screen area.
When moving the recording area, you need to click and drag the border accurately. If you move it too quickly, it may shift to an unintended position, so it is best to control it smoothly and precisely. By using this feature, you can perform more flexible and efficient recording with oCam.