Recommended


How to Fix Audio Sync Issues When Editing in Adobe Premiere
Using oCam at work or school? A license is required, and it removes all ads, including this window. See the paid version →
oCam is set to use Variable Frame Rate (VFR) mode by default, which allows it to adjust the frame rate flexibly depending on system performance and the recording environment. This setting is advantageous for efficient use of system resources, but it can cause compatibility issues with certain video editing software.
In particular, in professional editing software such as Adobe Premiere Pro, when loading a video file recorded with Variable Frame Rate, the irregular frame intervals may cause the audio and video to go out of sync. To fix this, you should change the setting in oCam to Constant Frame Rate (CFR) before recording.
To set it to Constant Frame Rate, follow these steps:
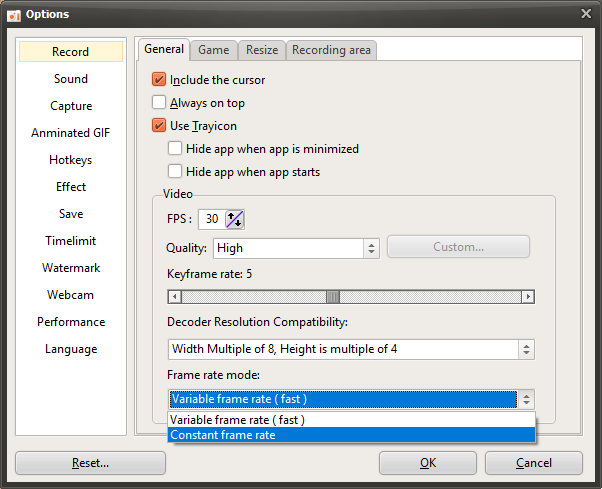
1. In the oCam main window, click 'Tools' in the top menu, then select 'Options'.
2. When the Settings window opens, go to the 'Recording' tab in the left menu.
3. In the 'Recording' tab, find the 'General' section and check the 'Frame Rate Mode' option.
4. Change the frame rate mode from 'Variable Frame Rate' to 'Constant Frame Rate'.
5. Click the 'OK' button to save the setting.
After changing to Constant Frame Rate and recording again, the frame intervals in the video will remain consistent, which can resolve audio and video sync issues in editing software such as Adobe Premiere Pro. This setting is especially essential for users who plan to edit videos and provides a more stable editing environment. After changing the setting, restart oCam and make a test recording to confirm that the result plays back correctly.
Programs
Another helpful tip
How to Reset oCam Settings (When the oCam Main Window Is Not Visible)
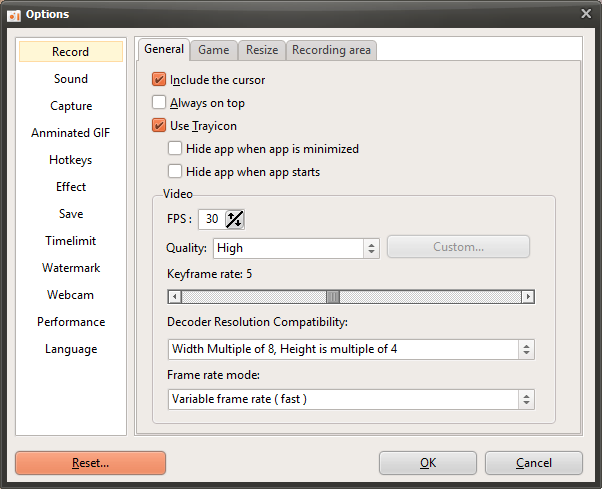
When the oCam main window is visible, you can reset the settings from the Options menu.
Go to Menu - Options, then click the Reset button as shown below to reset all oCam settings.
However, if the oCam main window has moved to another area of the PC screen for some reason and is no longer visible, you can reset it using the following method.
After closing oCam, open Windows File Explorer, go to the `%appdata%\ocam` folder, and delete the `Config.ini` file.
However, if you delete the `Config.ini` file directly, your registration information may also be deleted, so this method is not recommended unless absolutely necessary.