Recommended

If Avast is installed, please disable the DeepScreen feature.
Using oCam at work or school? A license is required, and it removes all ads, including this window. See the paid version →
When users who use Avast antivirus install or update an OhSoft program such as oCam, the installation process may repeat several times. This is caused by Avast's 'DeepScreen' feature. Below is a detailed explanation of the cause of this issue and how to resolve it.
The DeepScreen feature is triggered when there is not enough reputation information about an executable file, which can cause a program such as oCam to be recognized as suspicious. OhSoft makes efforts to maintain compatibility with antivirus software, but in this case, even though the program is functioning normally, a situation can occur where a legitimate executable file that is not malicious is unable to install or update properly because of a specific antivirus feature. This is similar to a situation where a properly developed program causes inconvenience to users because of a false positive from antivirus software.
To resolve this issue, you need to disable Avast's DeepScreen feature. Below is a step-by-step guide on how to turn off the DeepScreen feature:
1. Go to the main screen of Avast antivirus.
2. Click the 'Settings' button on the left side of the screen.
3. When the Settings window opens, select the 'Antivirus' button from the menu on the left.
4. In the 'Antivirus' section, find the 'Enable DeepScreen' checkbox and clear it.
After changing the setting, confirm that it has been saved, then try installing or updating oCam again. Once the DeepScreen feature is disabled, the repeated installation issue is likely to be resolved. If the problem continues, you may also want to apply the latest Avast updates or contact OhSoft support.
Programs
Another helpful tip
oCam Advanced Settings - Mouse Cursor Effects - Highlight Effects
Click Tools - Options on the oCam main menu, then open the Effects category to check the Highlight Effect settings.
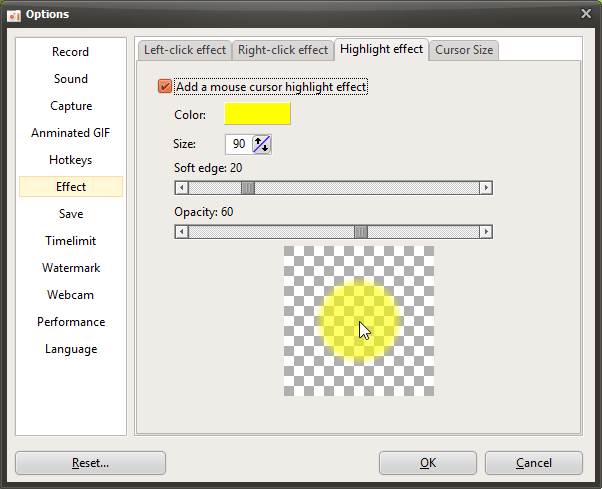
The Highlight Effect is used to help viewers immediately recognize the current position of the mouse cursor while watching a video.
The options are described below.
Color
- This is the color applied to the highlight effect. It is set to yellow by default.
Size
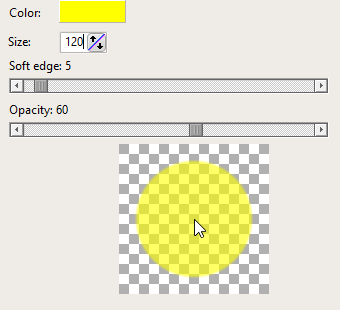
- When the highlight effect is enabled, a semi-transparent circle is drawn around the mouse cursor. This option sets the size of that circle. It is set to 90 by default.
Soft Edge
- The higher this value becomes, the softer the edge of the circle appears.
Opacity
- The lower this value is, the more transparent the circle becomes.
Preview
- Lets you preview the mouse effect you have configured.
If the opacity value is set too high, the highlight effect may cover the part of the screen where the mouse is located. For that reason, it is best to use an appropriate opacity setting.